
How To Make Glass Perfume Bottles
 Creating your own glass perfume bottles can be a rewarding experience. You get to explore the art of glassmaking while crafting something beautiful and functional. The demand for these elegant containers has been rising, driven by the allure of luxury and sustainability. Glass not only enhances the aesthetic appeal but also preserves the fragrance’s quality. As you embark on this journey, you’ll discover the essential materials and techniques needed to transform raw glass into exquisite perfume bottles. Dive into the world of glass crafting and let your creativity flow.
Materials Needed
Creating glass perfume bottles requires specific tools and materials. Let’s dive into what you’ll need to get started.
Essential Tools
Glassblowing Equipment
To begin your glassblowing journey, you’ll need some essential equipment. A furnace is crucial as it heats the glass to a molten state, reaching temperatures of around 1000°F. This heat allows you to shape the glass. You’ll also need a blowpipe, which lets you blow air into the molten glass to form a bubble. Other tools include jacks for shaping, shears for cutting, and molds for creating consistent forms. These tools have evolved over centuries, allowing artisans to create intricate designs with precision.
Safety Gear
Safety is paramount when working with molten glass. You should equip yourself with protective gear to prevent injuries. Heat-resistant gloves protect your hands from burns, while safety glasses shield your eyes from flying shards. A heat-resistant apron can also provide an extra layer of protection. Always ensure your workspace is well-ventilated to avoid inhaling any harmful fumes.
Raw Materials
Types of Glass
Choosing the right type of glass is essential for crafting perfume bottles. Quartz sand is the primary raw material used in glass production. You can select from various types of glass, each offering unique characteristics. For luxury perfume bottles, opt for high-quality glass that enhances aesthetic appeal and durability. The choice of glass can significantly influence the final product’s look and feel.
Colorants and Additives
To add color and character to your perfume bottles, you’ll need colorants and additives. These materials allow you to customize the appearance of your bottles. You can choose from a wide range of colors and effects, from subtle tints to vibrant hues. Additives can also enhance the glass’s properties, such as increasing its strength or altering its texture. Experimenting with different combinations can lead to stunning and unique designs.
By gathering these tools and materials, you’re well on your way to creating beautiful glass perfume bottles. Remember, the right equipment and materials are the foundation of any successful glassblowing project.
Design and Conceptualization
Designing your glass perfume bottle is an exciting step. It allows you to express creativity and set the stage for a unique product. Let’s explore how you can bring your ideas to life.
Creating a Design
Sketching and Planning
Start by sketching your ideas on paper. This helps you visualize the final product. Consider the overall aesthetic you want to achieve. Do you prefer sleek and modern, or ornate and classic? Sketching allows you to experiment with different styles without committing to a single design. Planning is crucial. It ensures that your design is not only beautiful but also functional.
Choosing Shapes and Sizes
Once you have a sketch, think about the shape and size of your bottle. The shape can influence how the fragrance is perceived. For instance, a tall, slender bottle might suggest elegance, while a round, squat bottle could imply warmth and comfort. Size matters too. Consider how much perfume the bottle will hold. A larger bottle might be more practical, but a smaller one could feel more luxurious. Choose shapes and sizes that align with your vision.
Preparing a Mold
Creating a mold is the next step in bringing your design to life. Molds help you achieve consistency in your bottles.
Mold Materials
Select materials that suit your design. Common choices include metal, plaster, and graphite. Each material has its pros and cons. Metal molds are durable and can withstand high temperatures. Plaster molds are easier to shape but may not last as long. Graphite molds offer a smooth finish but require careful handling. Choose a material that complements your design and meets your needs.
Mold Making Techniques
Crafting a mold requires skill and precision. You can use several techniques to create your mold. One popular method is casting, where you pour a liquid material into a mold and let it harden. Another technique is carving, where you shape the mold by hand. Each method offers different levels of detail and texture. Experiment with various techniques to find what works best for your design.
Design and conceptualization are vital steps in making glass perfume bottles. They allow you to explore your creativity and set the foundation for a stunning final product. As you design and prepare your mold, remember that each choice you make brings you closer to crafting a beautiful and unique perfume bottle.
Preparation of Materials
Before you can start forming your glass perfume bottles, you need to prepare the materials. This involves batching and melting, which are crucial steps in the glassmaking process.
Batching
Batching is the first step in preparing your materials. It involves measuring and mixing the raw ingredients that will form your glass.
Measuring Ingredients
You begin by measuring the ingredients accurately. The primary component is quartz sand, which forms the base of your glass. You also need to add soda ash and limestone. These ingredients help lower the melting point and stabilize the glass. Precision is key here. Even small variations can affect the quality of your final product. Use a digital scale for accuracy.
Mixing Components
Once you’ve measured your ingredients, it’s time to mix them. You want a uniform mixture to ensure consistent glass quality. Use a large mixing container and a sturdy spoon or mixer. Stir the ingredients thoroughly. This step is essential for achieving the right chemical balance. A well-mixed batch leads to a smoother melting process.
Melting
After batching, you move on to melting. This step transforms your raw materials into molten glass.
Furnace Setup
Setting up your furnace is the first task. You need a furnace capable of reaching high temperatures, around 1000°F. Ensure your furnace is clean and free of debris. This prevents contamination of your glass. Preheat the furnace to the desired temperature before adding your batch. A well-prepared furnace ensures efficient melting.
Melting Process
Now, you introduce your batch into the furnace. The heat causes the ingredients to melt and fuse together. This process can take several hours. During this time, you should monitor the temperature closely. Consistent heat is crucial for a successful melt. As the batch melts, it transforms into a transparent, low-melting inorganic glass. This material is prized for its high thermal and light resistance, making it ideal for perfume bottles.
By carefully preparing your materials, you set the stage for creating beautiful glass perfume bottles. Each step, from batching to melting, plays a vital role in the quality of your final product. With patience and precision, you’ll soon be ready to shape your molten glass into exquisite containers.
Forming the Perfume Bottles
Creating glass perfume bottles involves a fascinating process that combines artistry and technique. This section will guide you through the essential steps of forming these elegant containers.
Glassblowing Techniques
Glassblowing is an ancient art that has evolved over centuries. It allows you to shape molten glass into beautiful forms. Let’s explore the key techniques involved.
Gathering the Glass
Start by gathering the molten glass onto the end of your blowpipe. This step requires precision and control. You dip the blowpipe into the furnace, rotating it to collect a gather of glass. The amount you gather depends on the size of the perfume bottle you plan to create. Keep the glass evenly distributed on the pipe to ensure a balanced shape.
Shaping the Bottle
Once you’ve gathered the glass, it’s time to shape it. Blow gently into the pipe to form a bubble. This bubble will become the body of your perfume bottle. Use jacks and shears to refine the shape. You can create various designs by adjusting the pressure and rotation. Remember, practice makes perfect. Each attempt brings you closer to mastering this delicate craft.
“From the ancient practice of free-blowing methods and the introduction of the blowpipe, advancements in technology have played a pivotal role in the transformation of this intricate craft.”
Mold Blowing
Mold blowing offers a way to achieve consistency in your perfume bottles. This technique involves using a mold to shape the glass.
Using the Mold
Place the blown glass into a pre-prepared mold. The mold helps you achieve uniformity in size and shape. Close the mold around the glass and continue blowing gently. The glass expands to fill the mold, taking on its contours. This method is ideal for producing multiple bottles with the same design.
Achieving Desired Thickness
Controlling the thickness of your perfume bottles is crucial. You want them to be sturdy yet elegant. Adjust the pressure and timing as you blow into the mold. Too much pressure can make the glass too thin, while too little can result in a bulky bottle. Aim for a balanced thickness that enhances both durability and aesthetics.
“Advancements in technology, combined with the skill and creativity of artisans, have continually refined the art of blowing glass, shaping its rich history and ensuring its enduring legacy as a captivating form of artistic expression.”
By mastering these techniques, you can create stunning glass perfume bottles that captivate the eye and preserve the fragrance within. Each bottle becomes a testament to your skill and creativity, a unique piece of art that reflects your personal touch.
Annealing and Decoration
Once you’ve shaped your glass perfume bottles, it’s time to focus on annealing and decoration. These steps ensure your bottles are both durable and visually appealing.
Annealing Process
Annealing is a crucial step in glassmaking. It involves slowly cooling the glass to relieve internal stresses.
Cooling the Glass
You need to cool the glass gradually to prevent it from cracking. Place your bottles in an annealing oven, also known as a lehr. This oven maintains a controlled temperature, allowing the glass to cool evenly. The process can take several hours, depending on the thickness of the glass. By cooling the glass slowly, you ensure its structural integrity.
Avoiding Stress Cracks
Stress cracks can ruin your beautiful creations. To avoid them, monitor the temperature closely during the annealing process. Keep the temperature consistent and avoid sudden changes. This careful control helps the glass molecules settle into a stable structure. As a result, your perfume bottles will be strong and long-lasting.
Decorating Techniques
Decoration adds personality and charm to your glass perfume bottles. You can choose from various techniques to enhance their appearance.
Engraving and Etching
Engraving and etching allow you to add intricate designs to your bottles. Use a diamond-tipped tool for engraving. This tool lets you carve patterns directly onto the glass surface. For etching, apply a stencil and use an acid or sandblasting technique to create frosted designs. These methods have roots in ancient practices, where artisans engraved colorless glass with detailed patterns and scenes.
Applying Colors and Patterns
Color and pattern application can transform your bottles into stunning works of art. Use heat transfer decorations to apply vibrant colors that resist wear and tear. You can also experiment with stained glass techniques, similar to those used in creating colorful windows. By fitting pieces of colored glass together, you can achieve intricate designs that captivate the eye.
“The development of stained glass allowed for intricate designs and colorful displays, much like the vibrant patterns you can create on your perfume bottles.”
By mastering annealing and decoration, you elevate your glass perfume bottles from simple containers to exquisite pieces of art. Each bottle becomes a testament to your creativity and skill, ready to delight anyone who sees it.
Assembly and Quality Check
Once you’ve crafted your glass perfume bottles, it’s time to assemble the components and ensure everything is in top-notch condition. This stage is crucial for both functionality and aesthetics.
Assembling Components
Attaching the Neck and Cap
You start by attaching the neck to the bottle. This part needs precision. The neck should fit snugly to prevent any leaks. Use a strong adhesive suitable for glass to secure it in place. After the neck, you move on to the cap. The cap not only seals the bottle but also adds to its visual appeal. Choose a cap that complements your design. Make sure it fits perfectly to maintain the fragrance’s quality.
Ensuring a Tight Seal
A tight seal is essential for preserving the perfume’s scent. You don’t want any leaks or evaporation. Test the seal by gently shaking the bottle. If you notice any leaks, adjust the cap or neck until you achieve a perfect fit. This step ensures that your perfume remains fresh and fragrant for a long time.
Quality Control
Quality control is the final step before your perfume bottles are ready for use or sale. You want to ensure that each bottle meets high standards.
Inspecting for Flaws
Carefully inspect each bottle for any flaws. Look for cracks, bubbles, or uneven surfaces. These imperfections can affect the bottle’s durability and appearance. Use a magnifying glass for a closer look. If you find any defects, set those bottles aside for further evaluation or recycling.
Testing Durability
Durability testing is vital. You want your bottles to withstand everyday use. Conduct a series of tests to check their strength. Drop them from a low height onto a soft surface to see if they hold up. You can also expose them to light and heat to ensure they maintain their transparency and resistance. Inorganic glass, like the one used in your bottles, often shows excellent thermal and light resistance compared to other materials. This makes it ideal for long-lasting perfume containers.
By following these steps, you ensure that your glass perfume bottles are not only beautiful but also functional and durable. Each bottle becomes a testament to your craftsmanship, ready to delight anyone who uses it.
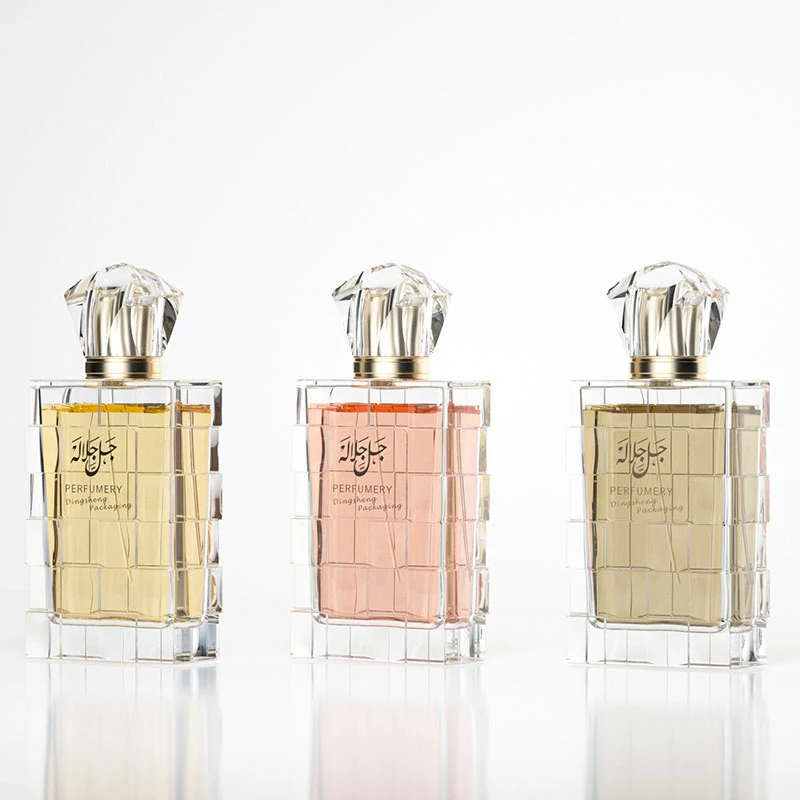
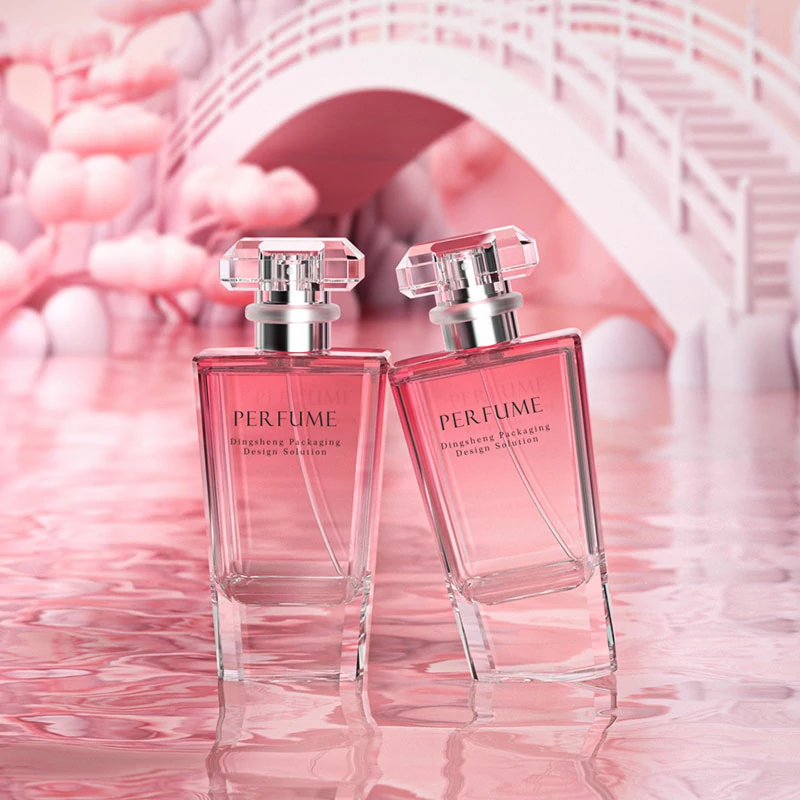
Packing and Presentation
The final steps in creating your glass perfume bottles involve packing and presentation. These elements play a crucial role in how your product is perceived by consumers. Let’s explore how you can make your bottles stand out.
Packaging Options
Choosing the right packaging for your perfume bottles is essential. It not only protects the product but also enhances its appeal.
Choosing Materials
When selecting packaging materials, consider both aesthetics and functionality. Glass offers a premium look and feel, but it can be fragile. You need to package it correctly to prevent damage. Use sturdy boxes with protective inserts to keep the bottles secure. Eco-friendly materials are also a great choice. Glass is highly recyclable, making it a preferred option for environmentally conscious consumers and brands. By choosing sustainable packaging, you appeal to a growing market of eco-aware buyers.
Designing Labels
Labels are more than just informative; they are a key part of your brand’s identity. Design labels that reflect the essence of your fragrance. Use colors and fonts that align with your brand’s image. Ensure the label includes essential information like the fragrance name, ingredients, and volume. A well-designed label can make your product memorable and help build brand loyalty.
Final Presentation
The way you present your perfume bottles can significantly impact consumer perception. A thoughtful presentation can turn a simple bottle into a luxurious experience.
Displaying the Product
Consider how you will display your perfume bottles. Transparent packaging can enhance consumer confidence by allowing them to see the product. Arrange the bottles in an attractive manner, highlighting their unique designs. Use lighting to accentuate the glass’s clarity and color. A well-displayed product can captivate potential buyers and encourage them to make a purchase.
Marketing Tips
Marketing your perfume bottles effectively is key to reaching a wider audience. Highlight the unique features of your bottles, such as innovative designs or eco-friendly materials. Engage with consumers through social media and other platforms. Share the story behind your product and invite feedback. This interaction fosters consumer engagement and can lead to increased brand loyalty. As you market your product, remember that continuous improvement and innovation will help you stay competitive in the market.
By focusing on packing and presentation, you ensure that your glass perfume bottles not only look beautiful but also resonate with consumers. Each detail, from packaging materials to marketing strategies, contributes to the overall success of your product.
You’ve journeyed through the fascinating process of crafting glass perfume bottles, from design to final presentation. Each step, from conceptualization to decoration, plays a vital role in creating a product that stands out. Now, it’s your turn to experiment and bring your unique designs to life. Embrace the satisfaction of crafting a personalized perfume bottle that reflects your creativity and style. As consumers increasingly seek personalized experiences, your handcrafted bottles can offer a unique touch that resonates with them. Dive into this creative endeavor and enjoy the rewarding experience of glassmaking.